A Blog About a Dragon (Or, How to Build a Giant Dragon Puppet in 858 Easy Steps)
August 5th, 2019
A Blog About a Dragon (Or, How to Build a Giant Dragon Puppet in 858 Easy Steps)
A Blog About a Dragon (Or, How to Build a Giant Dragon Puppet in 858 Easy Steps)
by Jamie
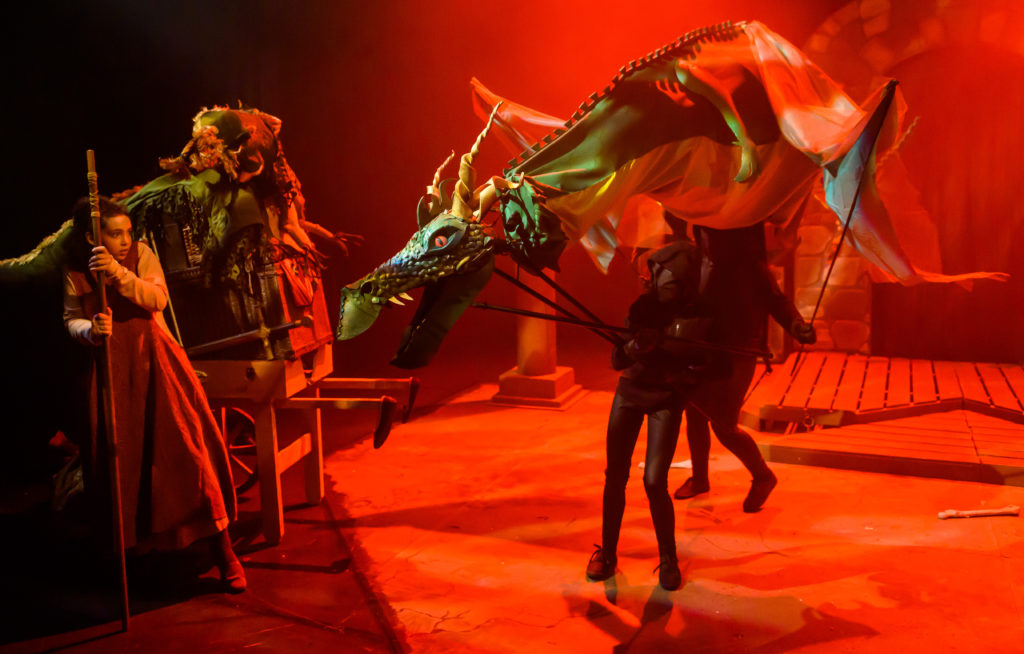
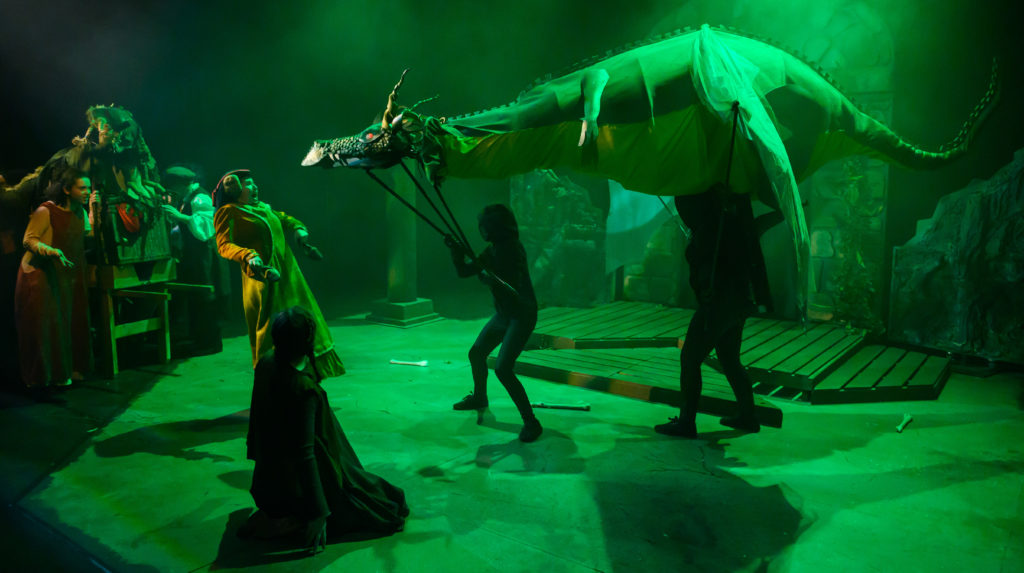
This weekend we closed our production of A Play About a Dragon by Steph DeFerie, which means we can finally share some of the photos of the giant dragon puppet that I built for the show!
I also wanted to document and share the process of designing, building, and trouble-shooting the dragon, partially because I have been positively swallowed up by the task the last few weeks, but also because blog posts were a huge help in the process, so if I can be of help to someone out there who is ALSO trying to build a giant dragon puppet, I’m thrilled to pay it forward! I appreciate this will be boring to almost everyone who is NOT also building a giant dragon puppet.
It’s More than a Dragon: It’s a Canoe
Even though it was the first show of the season, it was also the last to be confirmed, so we didn’t have a ton of time to work out the logistics of how we’d achieve the moment in the script when a show-stopping dragon emerges from a cave and battles the protagonists. I wasn’t super worried, at first, because I know a lot of puppet builders and figured one of them would build it for us. No problem, right?
Wrong.
At one point, I asked my friend Braden if he’d take it on, and his response helped me understand the magnitude of what I was asking. “I really wish I could, Jamie,” he said. “I’ve always wanted to build a dragon puppet, but the thing is, building a dragon puppet to a puppeteer is like building a canoe for a master carpenter. It’s a way of showing off your mastery of the skill. And it takes time.” Time he didn’t have, unfortunately, so by the end of June, it was clear the task would fall to me.
Rent-a-Dragon
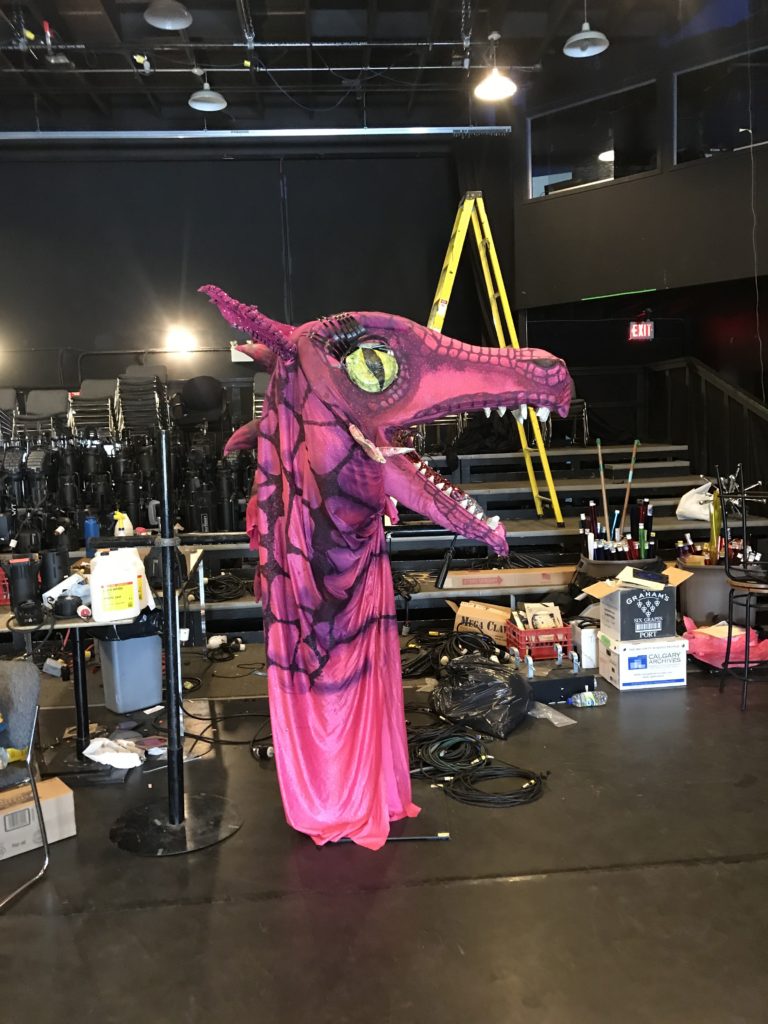
Before building, I decided to try to source an existing dragon puppet. There have been plenty of productions of Shrek The Musical and The Hobbit and Neverending Story about, and I figured one of their dragon puppets would still exist to borrow or rent. Storybook Theatre had built a massive and beautiful dragon puppet for their production of Shrek, and had sold it to a local educational theatre company called Trickster Theatre, who kindly agreed to let me borrow it. It was a five person puppet, and both of us wanted it to operate with fewer people, so if I could figure it out, it would help us both out. Unfortunately, after spending two days with the puppet, I realized that task was above me. It took two people just to lift the head, and my puppet needed to be operated by two very small girls. I realized it would be impossible for me to alter it without losing the length of it, which was a bit long for our stage anyway, so I had to send her back to David.
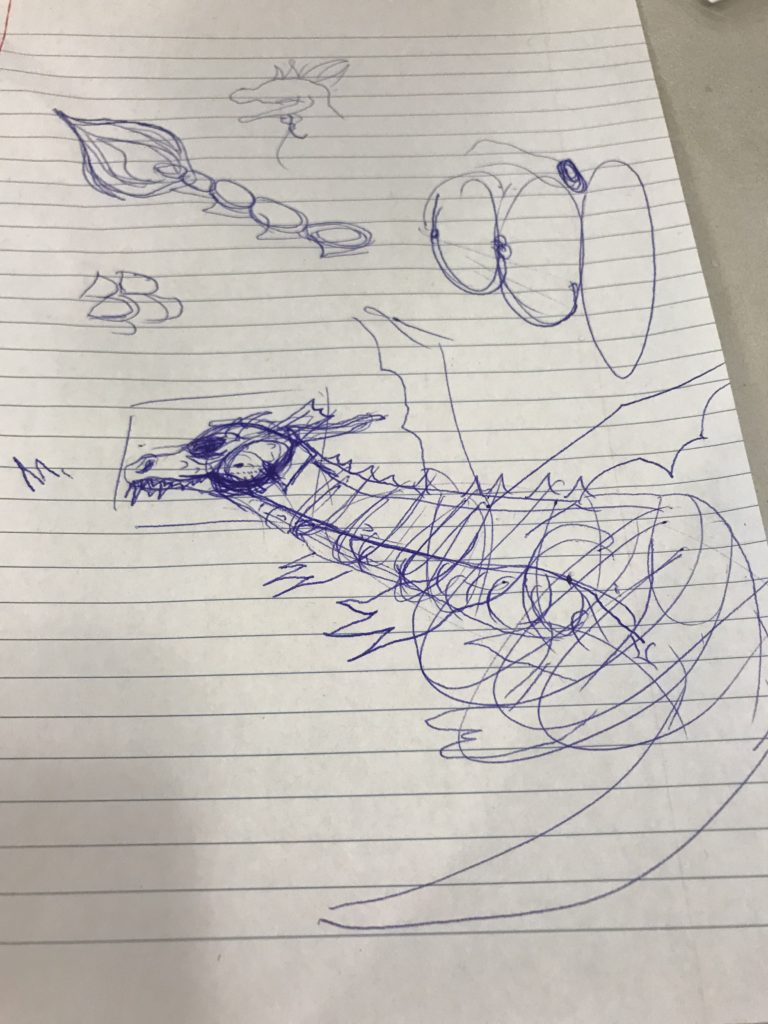
Designing a Dragon Puppet
With the task of building a puppet now squarely on my shoulders, and only two weeks until rehearsal, I was petrified but out of options. I began the design.
We knew the construction of the puppet had to be lightweight. It had to be operated by two smaller youth, no more, and had to be SCARY. The dragon is killed in the play, so it couldn’t be adorable or we’d feel bad for it. It had to be big, and ideally breathe smoke. It also had to have a detachable head, because there was one scene where the head is pops out of a cave, and there was no room for the body behind it.
I took my instruction from a number of websites and sources, as well as from examining the Storybook Dragon I’d borrowed. I decided to build a 16 foot dragon, and planned for the head to be operated by one puppeteer, and the body and wings/arms to be operated by the other. I imagined it would be roughly the size of a horse (if a horse had a giant tale) with a smaller head than the one I’d borrowed to keep it light. For a while, I wondered if I would make hind legs that could attach to the actor’s legs to make the dragon walk, but I gave up on that as I learned more about how the body suspended.
Building a Dragon Head
Building the head took a while to figure out. Should I sculpt it out of foam? Should it be hollow to keep it lightweight, or would it collapse in on itself?
Thankfully, I stumbled upon A Mad Art Lab post which gave me a printable pattern for a dragon’s head! UPDATE: Mad Art Lab seems to no longer be active, but so many of you have emailed me asking for the pattern, that I found it and have uploaded it here. Email me if you want the text from that original Mad Art Lab post as well.
CYPT didn’t have any EVA foam, as suggested in the pattern, but we had TONS of old puzzle piece-style floor mats which are essentially the same, so that’s what I used. Plus they had a cool texture and were free.
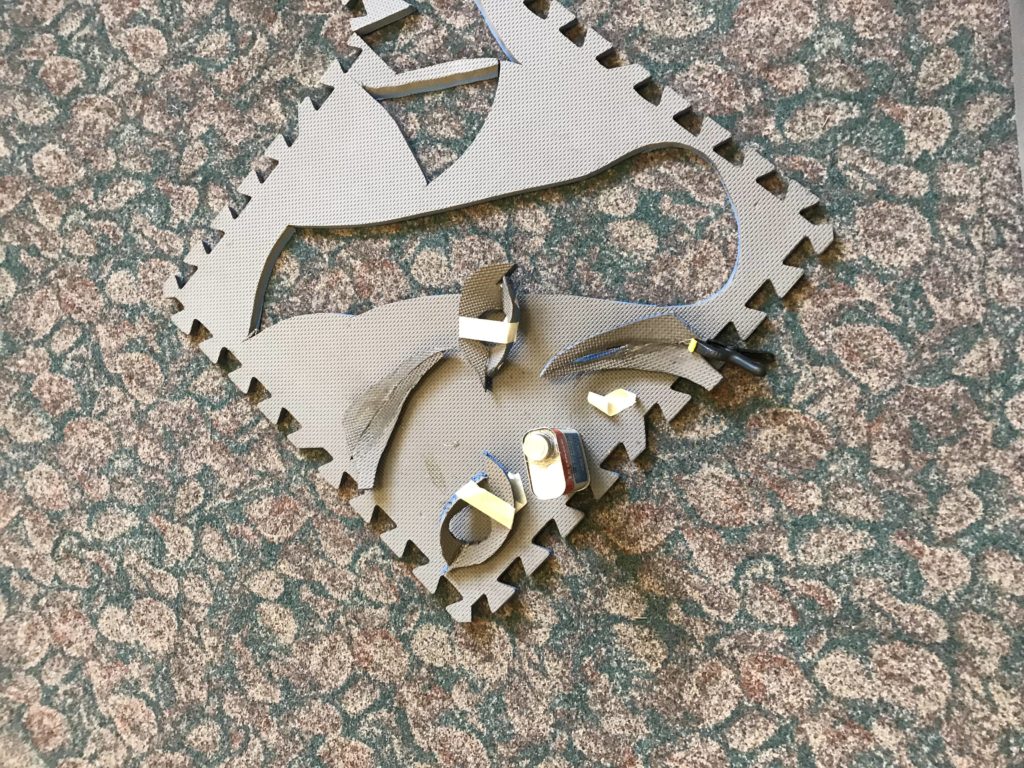
The pattern on that site is fantastic, because it gives an excellent skull shape and does a lot of the work for you. It’s a shame he doesn’t give full instructions, because what he DOES give is so helpful! There were a few challenges with bevelled cuts (he lists almost all of the bevelled cuts on the pattern, but not all of them) so there was a lot of trial and error to get it together and my dragon’s brow-bones don’t look the same as his, but they’re still cool. I also shortened the jaw significantly. A VERY SHARP exacto blade is needed for this task to get clean cuts. For puppet makers reading this, if you decide to use his pattern, feel free to contact me to find out which bevels aren’t clearly listed on his pattern. I expect I’ll remember them until the day I die. I might need therapy after this build!

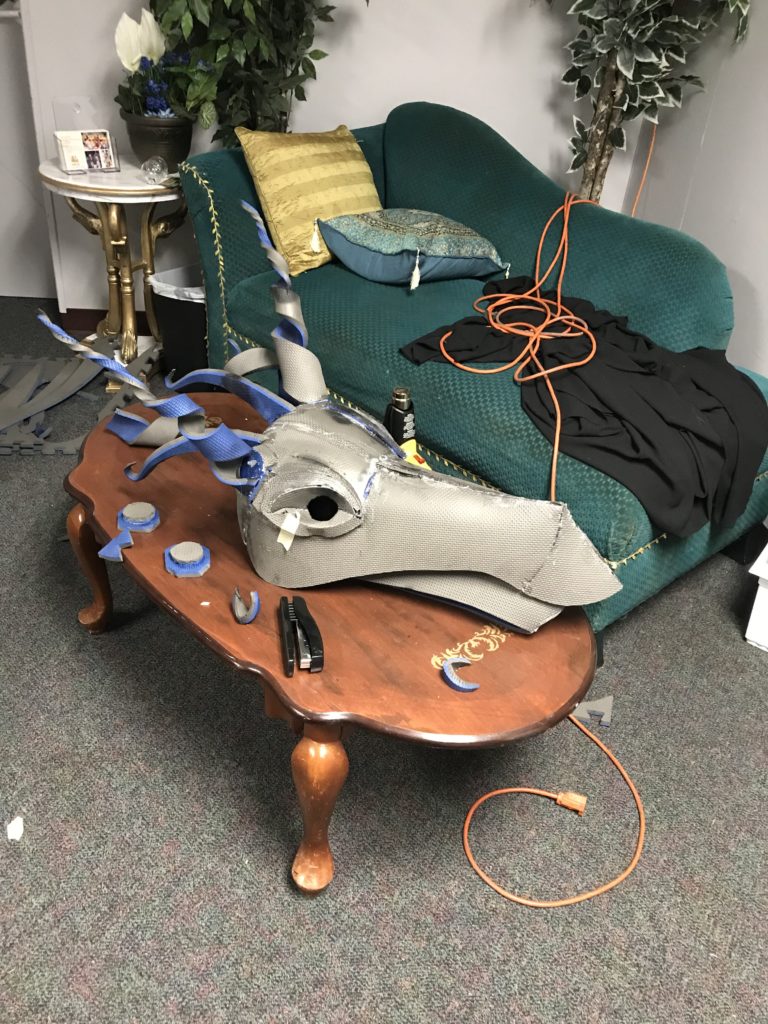
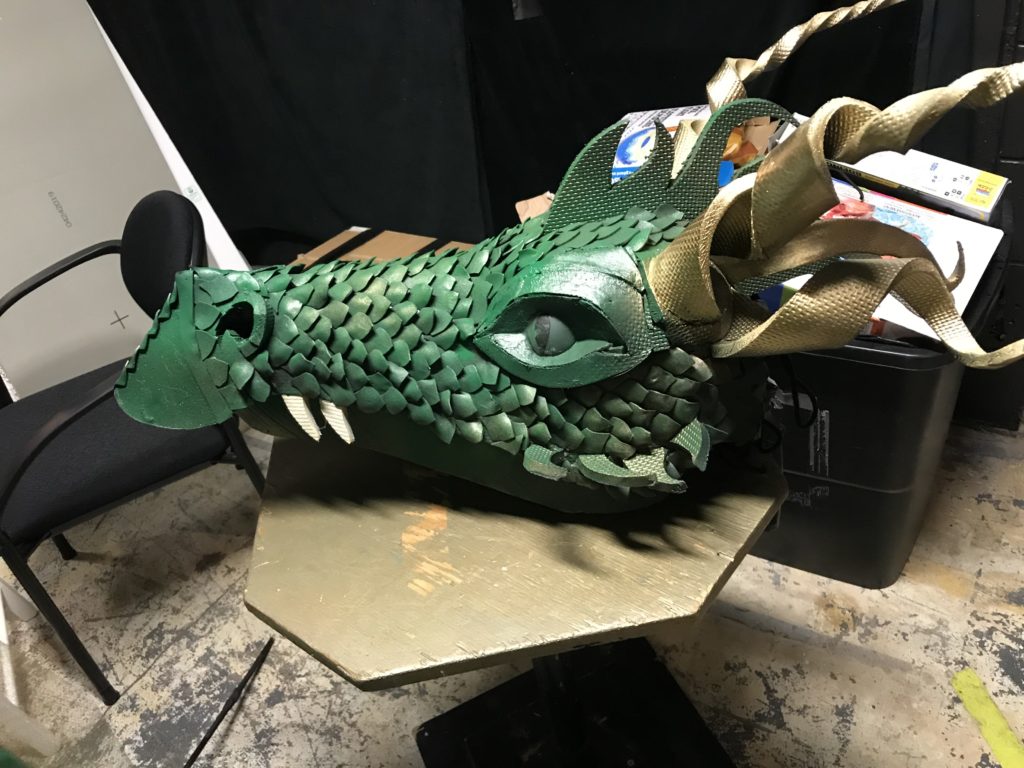
Contact cement was my adhesive torture of choice, and I used a heat gun to gently warm and mold the foam pieces into more organic shapes and build horns. I also had to build it a surface for under the jaw, which I just traced on a puzzle mat once the jaw was attached. Nostrils and a fringe were sculpted out of scrap puzzle mat foam.
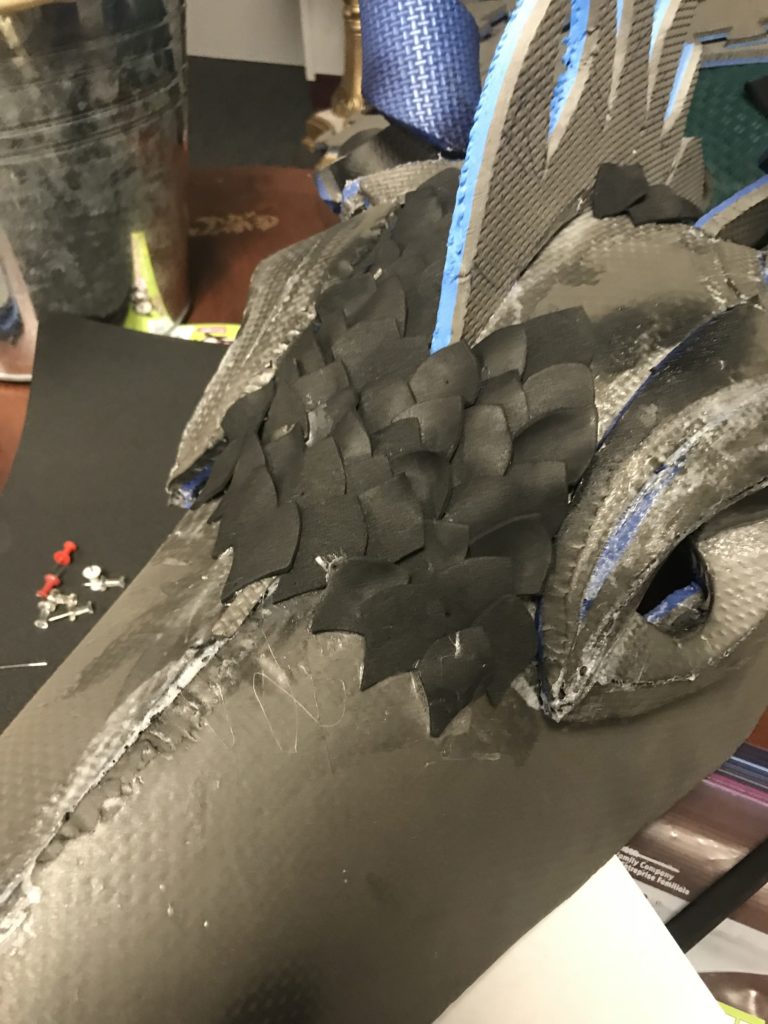
Once it was glued together, Zoe went to work cutting out scales for me, which were made out of super thin fun-foam from dollar and craft stores. I used the heat gun to shape these as well, and individually glued each one on. I used straight pins to keep them still while the contact cement dried, which made it look like she was getting acupuncture. I wish I’d figured out the straight pin thing earlier when I was gluing the skull together, because that task required a lot of clamps and took way longer than it needed too. Pins would have been the solution.

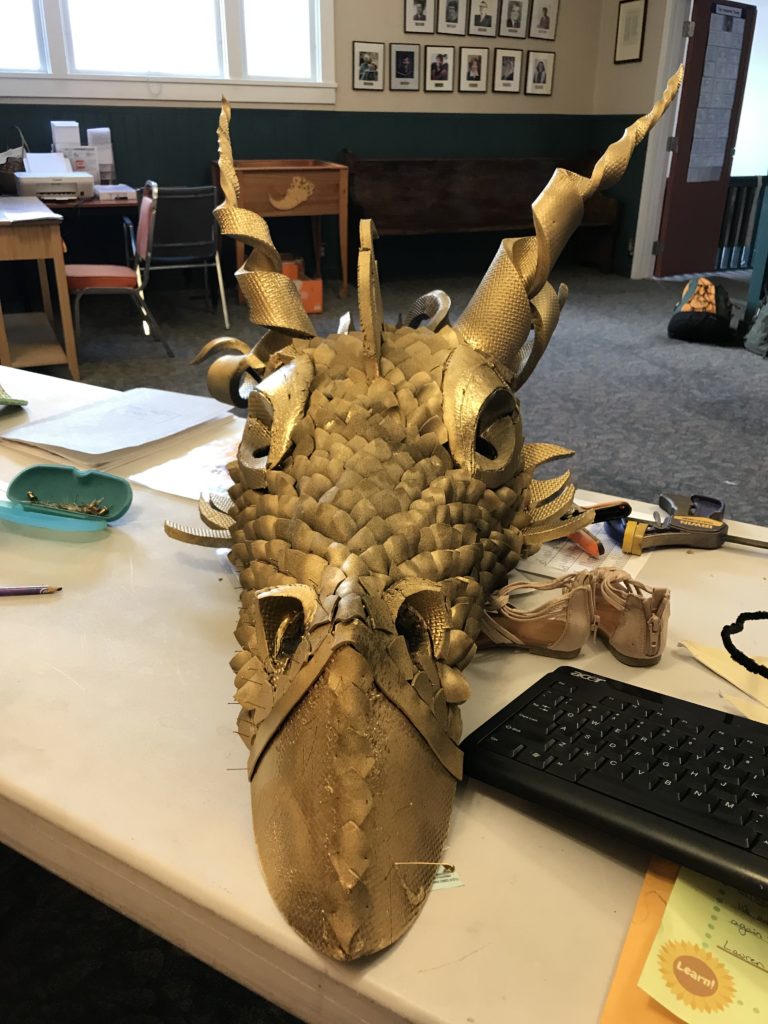
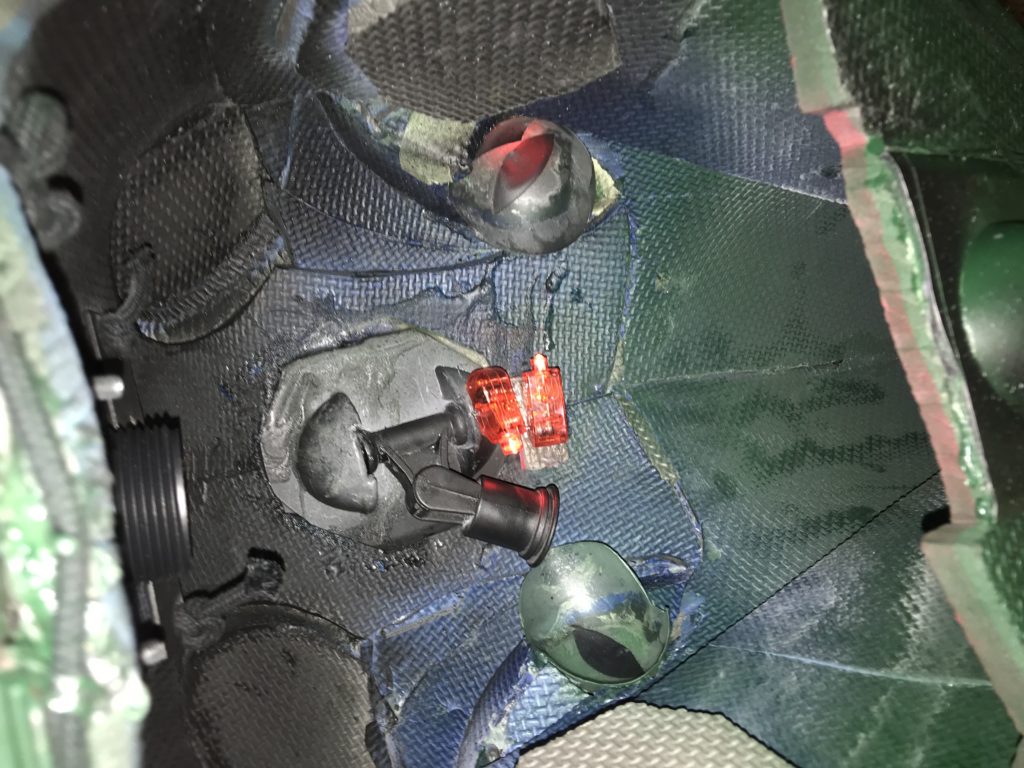
She was given several coats of spray paint, to allow for texturing, including a base coat and gentle top dusting of gold for sheen. Teeth were added last, as well as eyeballs made out of plastic Christmas ornaments, which I cut in half with an exacto, added pupils to, and frosted gently. Dollar store “finger lights” made her eyes glow red, and I just hot glued those inside the head. Stupidly, I didn’t use hot glue until the very end of this process – I usually try to avoid hot glue for props, because it always breaks off or melts under stage lights or leaves little strings of glue, but it was actually the most reliable adhesive I used in the entire project.
I knew the head needed to be capable of serpentine movement, so I needed to find some way to give it a swivelling neck/puppet stick attachment. I started by using Swiffer-style Dollarama floor mops because they have that 360 degree rotation, but after attaching two of them, I quickly learned that they had great rotation but no stability, and the neck would just flop over.
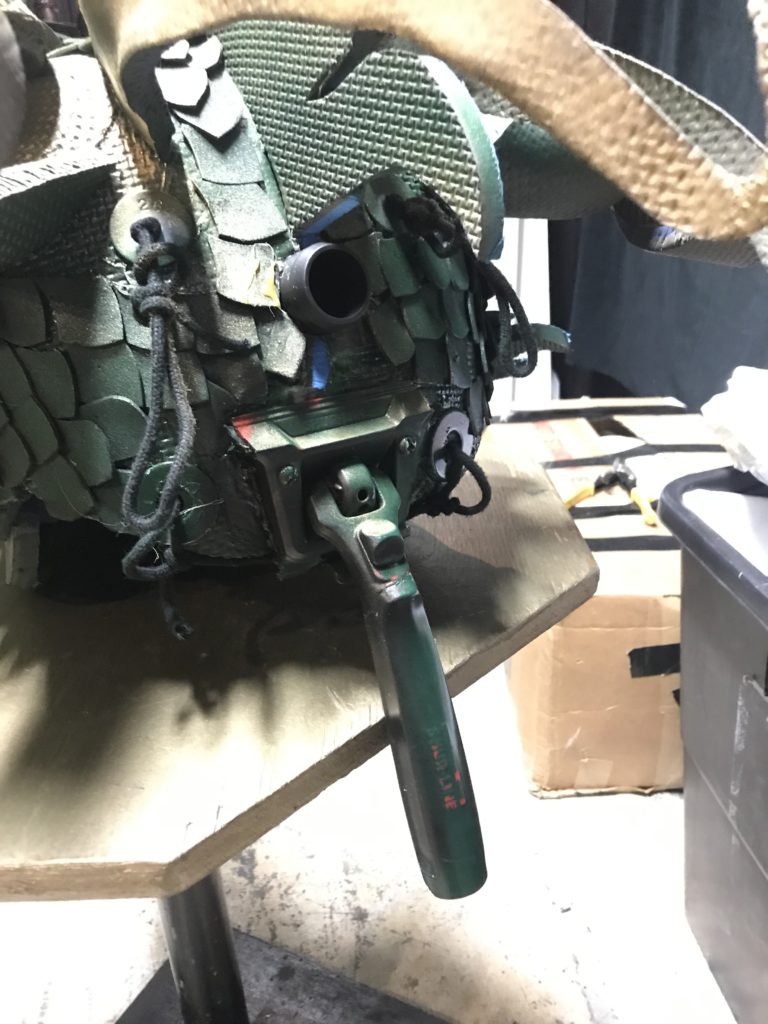
Ultimately, I ended up using two of those Swiffer joints (one under the jaw and one inside the skull), and one paint pad brush applicator attachment (like you’d use to paint a deck) that could only rotate up and down, not left and right to give the neck some stability. Each of these attachments were glued on, but also strapped or bolted through the foam, because the glue never held on its own.
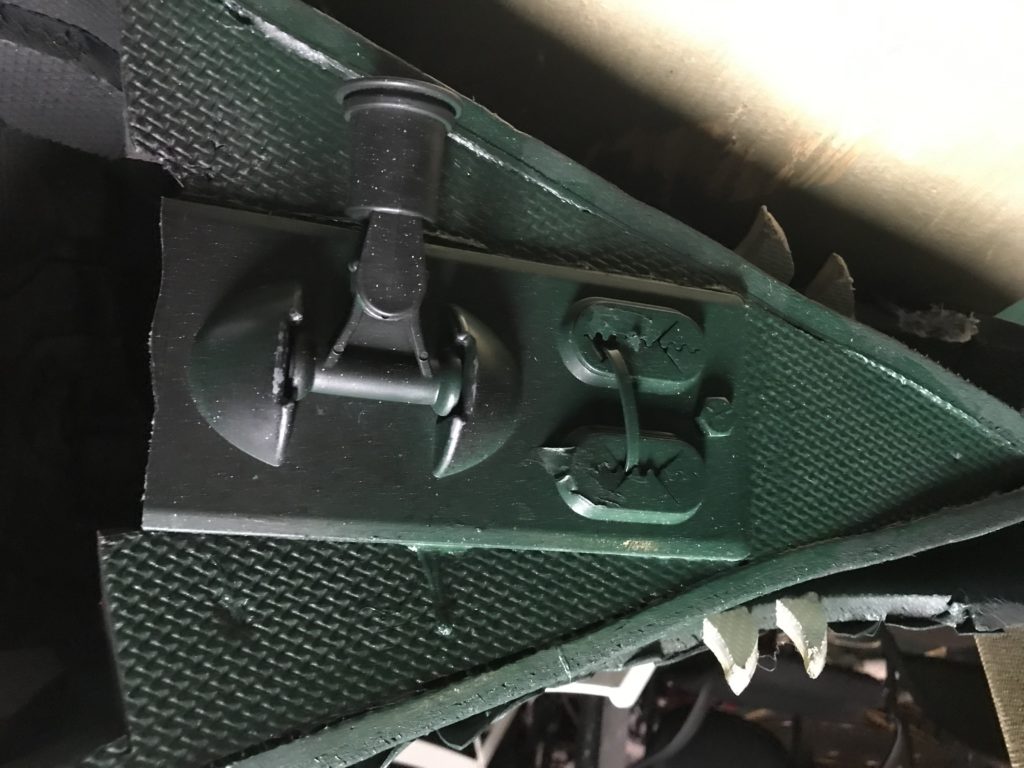
This makes it a three-stick-operated head, which is complicated, but with practice very effective. Plus, because I used mop joints and paint pads, we were able to use lightweight broomsticks as the sticks, which can be detached easily or adjusted in length using different lengths of broomstick.
Metal washers were mounted on the back of the head, allowing me to string through tie-line, which would eventually be used to connect the head loosely to the neck.
Building a Dragon Puppet Body
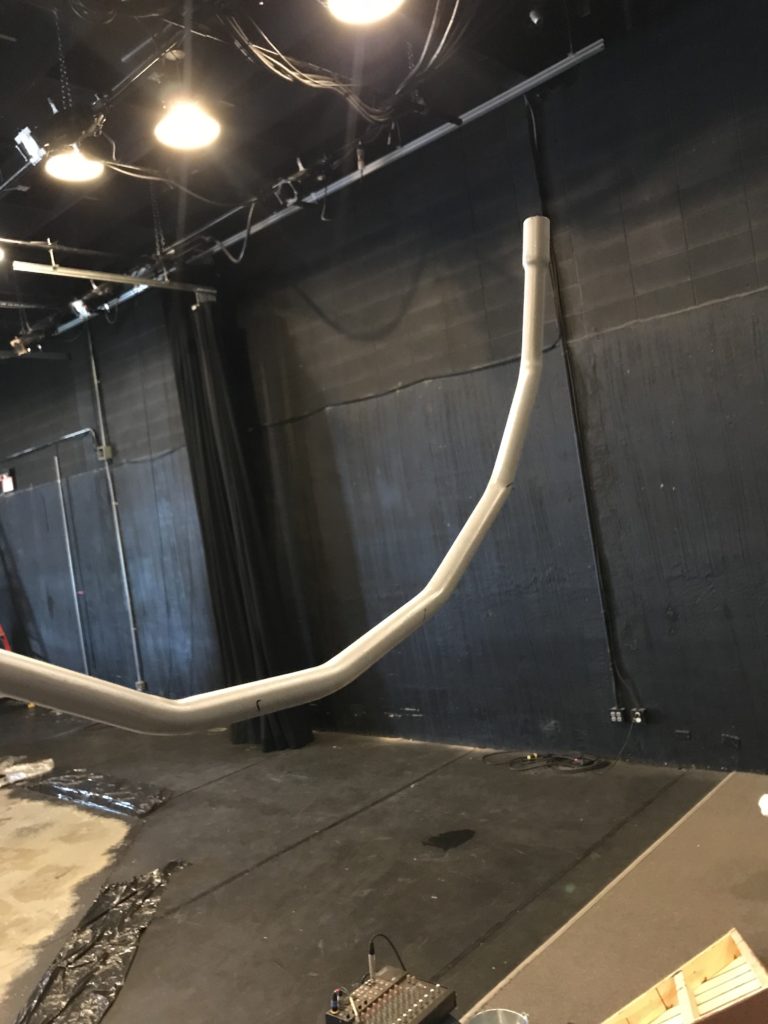
The body of the puppet was less finicky than the head, but the hardest to design given its size. I wanted the spine to articulate a bit, so I used a rubber hose wrapped in a pool noodle at first, but after assembling it and putting on the fabric skin, it was WAY too floppy and I had to start completely over.
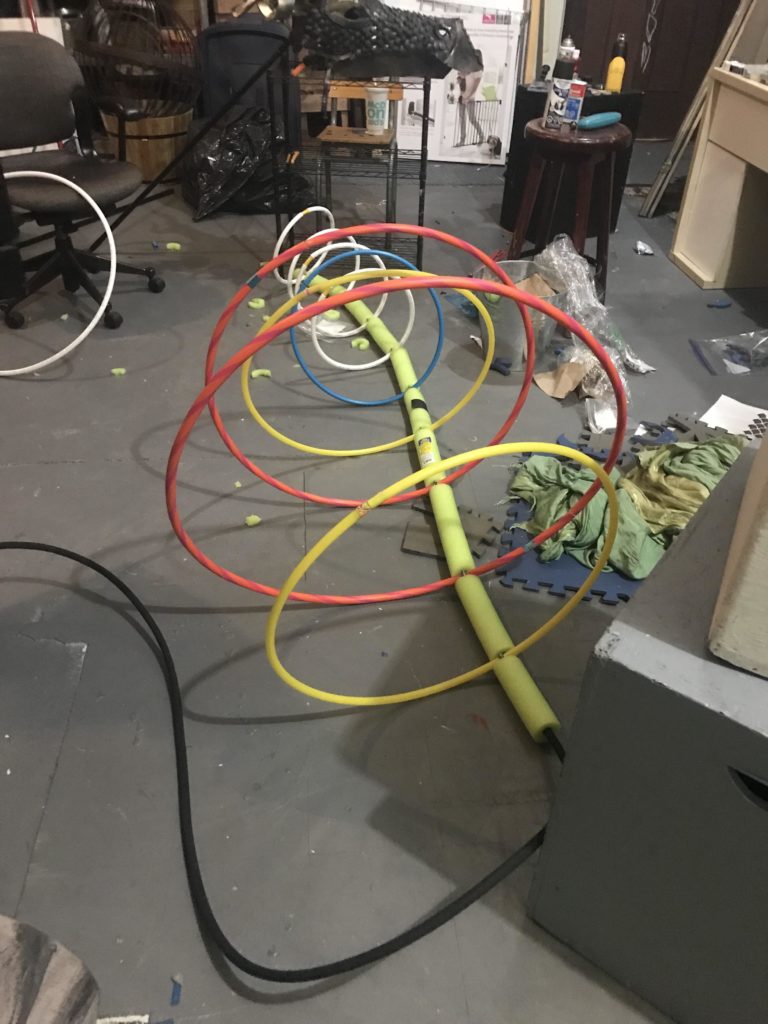
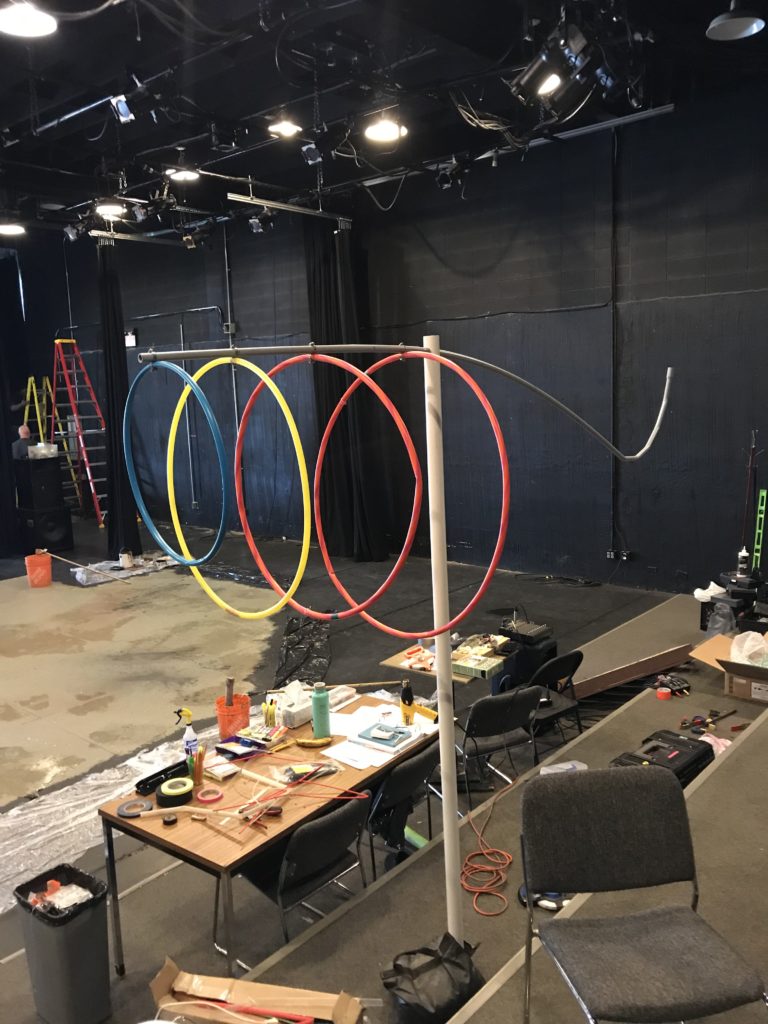
The spine, eventually, was made out of grey PVC conduit. I think it was 3/4” but I can’t remember. I drilled a 1” hole at the top of a white PVC pipe (2”) that I threaded the spine through. The white PVC would eventually attach to a hiking backpack (external metal frame) to keep the body up. Hula hoops were clamped onto the grey PVC spine to make ribs and the shape of the body. I took some inspiration from Stage Monkey’s how-to page on making their Shrek Dragon.
The body was divided into three sections: the neck; the torso, and; the tail.
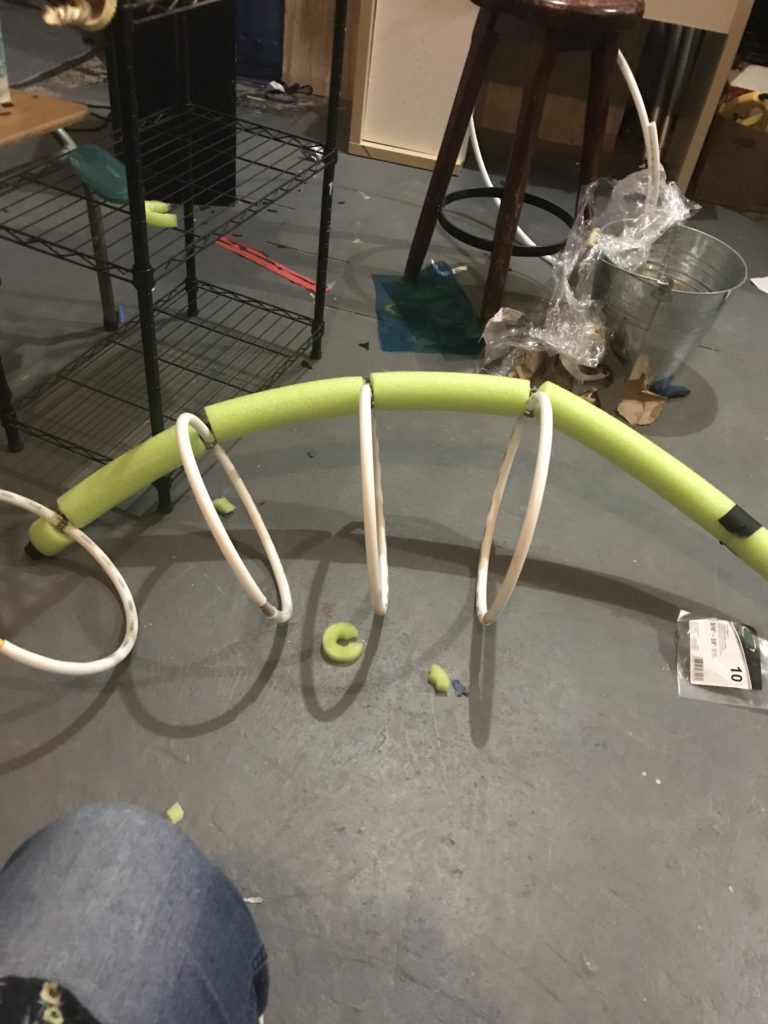
- The Neck: The spine of the neck was actually NOT made out of PVC, but rather out of the pool noodle-wrapped garden hose from draft one of the body. This gave the neck some flexibility that I wanted to keep from the first draft. I made the neck … “ribs” ….? out of PEX water tubing secured together by dowels. The garden hose “spine” was then glued into the end of the grey PVC pipe that makes the spine for the torso and tail. At the top of the neck, I made a little drum-skin to cover the opening and attached four little quick-links to attach to the head.
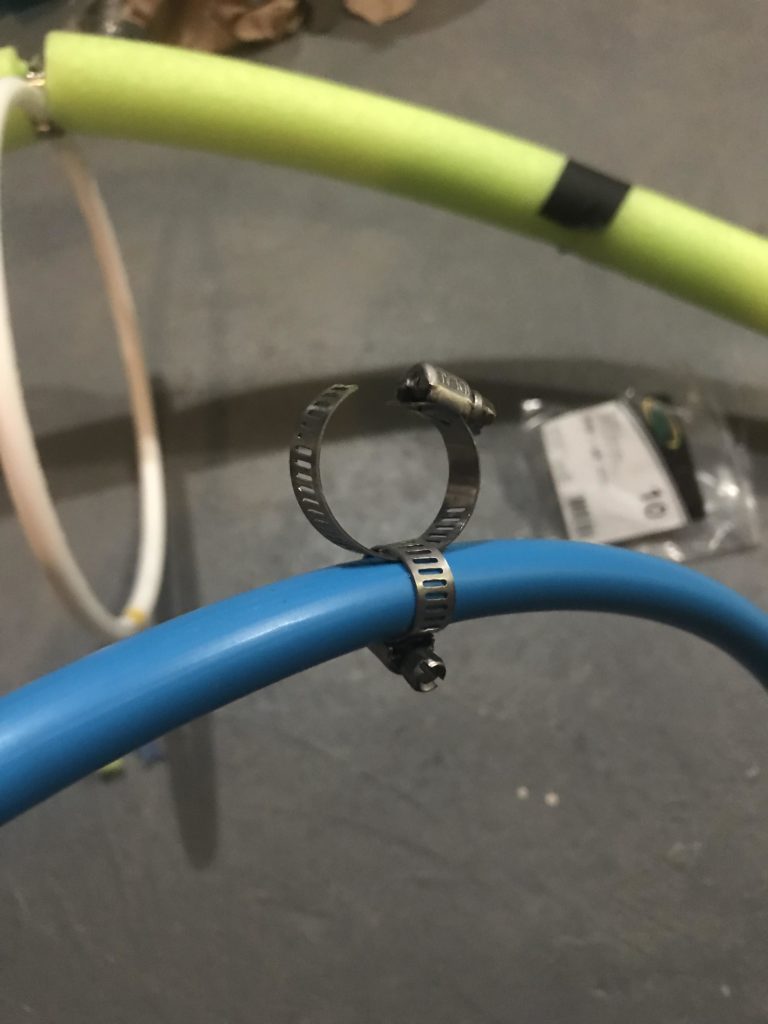
- The Torso: Increasingly larger hula hoops made up the body, and then got smaller after the mid-point where the white PVC support was attached. I made sure each of these hula hoops was clamped tightly using the little clamps pictured to the right. I used some spare hose along the bottom of the hoops, just zip-tied on to give the underside of the dragon a bit of strength, but not rigidity. I’m not sure how much these actually helped or worked, but I did it.
- The Tail: the end of the spine was given a few blasts of the heat gun, and then formed to point up like a tail. I originally wanted an articulated tale that could sway and move, but I decided I’d need another puppeteer for that. The spine was then wrapped in a pool noodle and stuffed with pillow stuffing to give it shape.
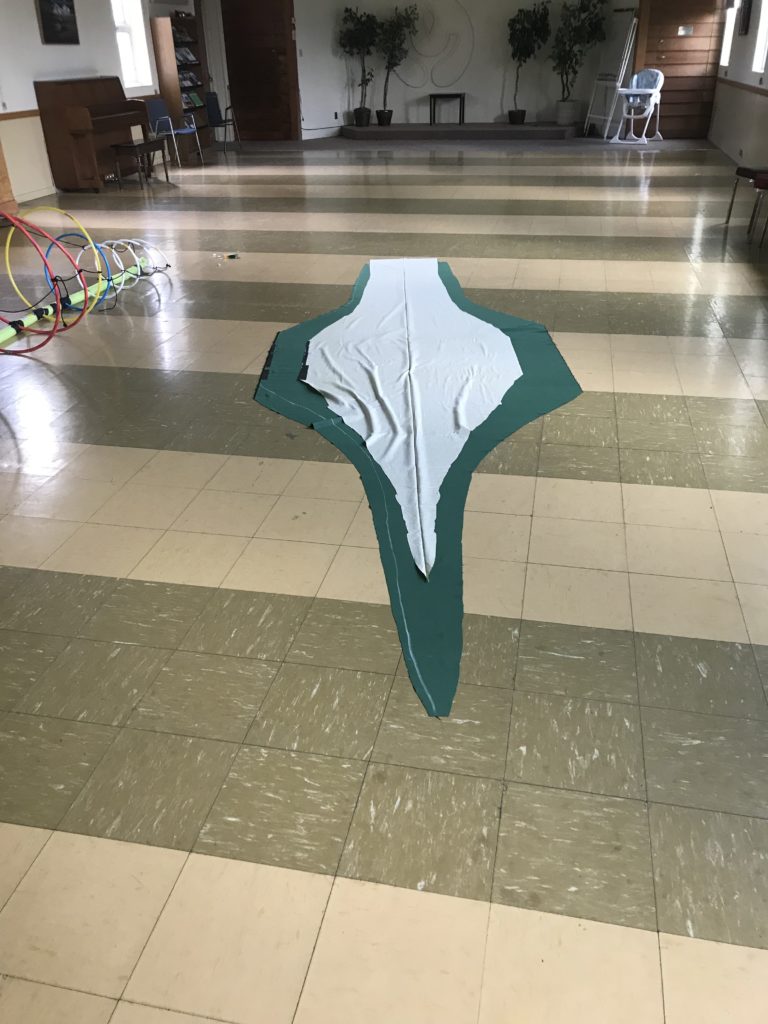
Once the first version of the skeleton was built, I made the skin out of fabric, had it sewn together, and kind of fit it over the skeleton like a sock. I ended up having to rip it open and redo this when I rebuilt the skeleton, which was a lot of work.
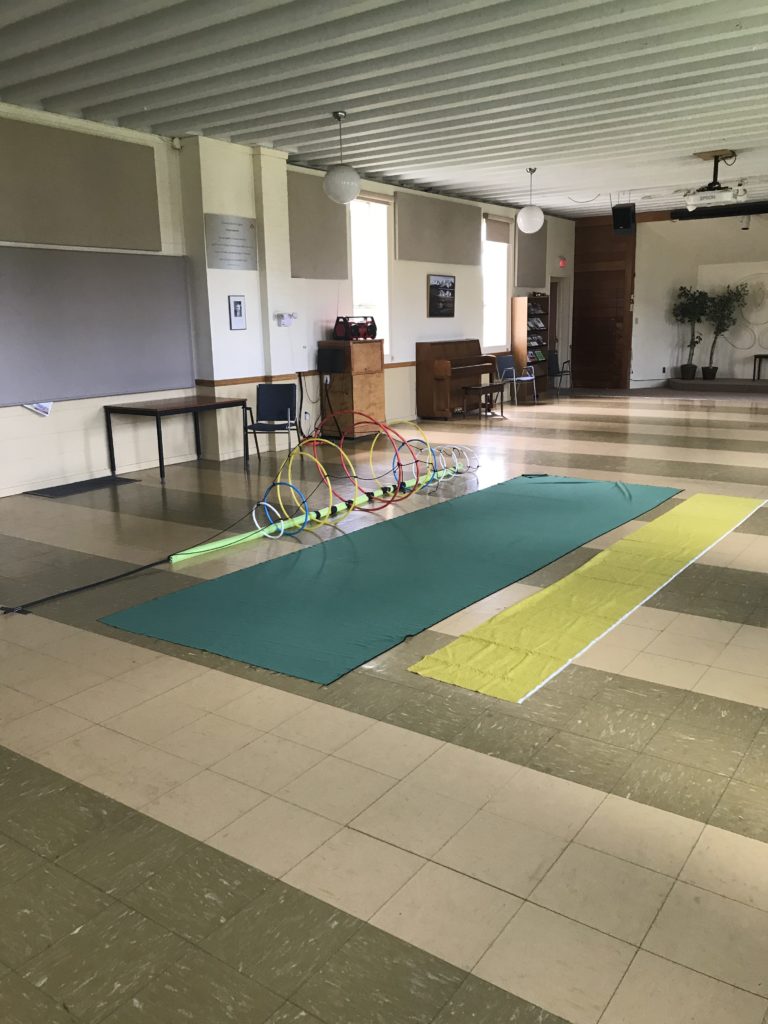
The skin was made up of two fabrics – yellow for the tummy and green for the back – and I made the pattern for this fabric by measuring the circumference of each hula hoop and lining those measurements up along the length of the spine. I draped the spine with the fabric (I used adhesive velcro strips to hold the spine to the fabric, which kind of worked). I then sewed it up and ripped a hole in the tummy for the pole.

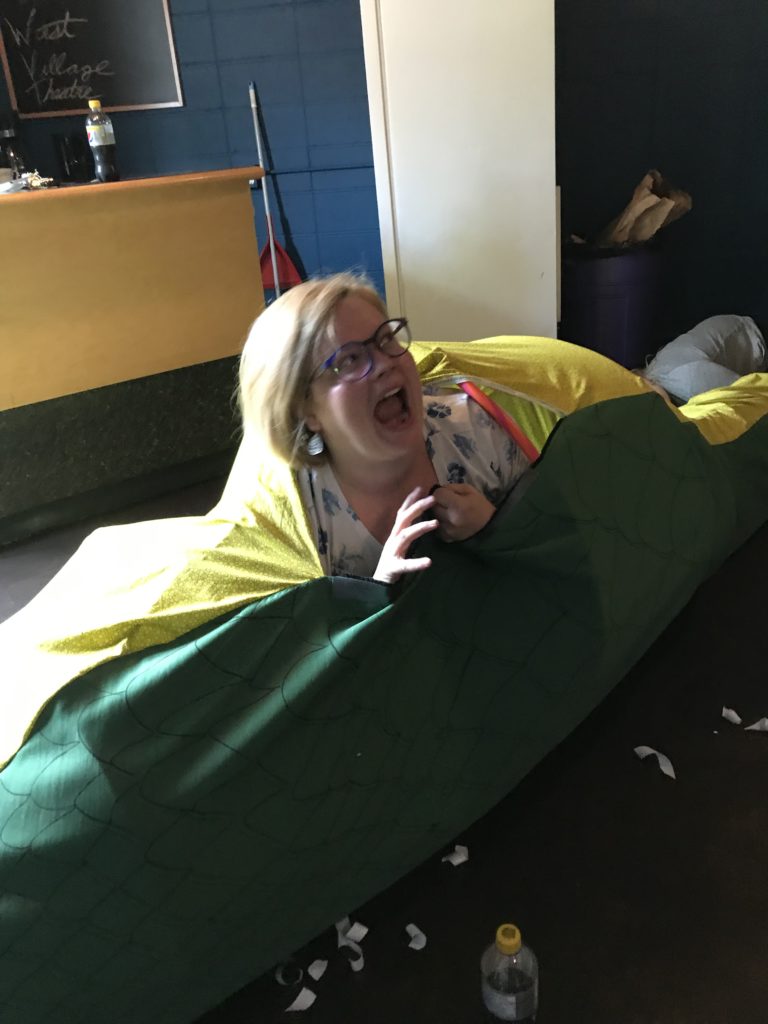
Later, I also did sew a couple of the hula hoops TO the fabric itself, mostly around the tummy, so that when the dragon falls at the end of the play, the skin doesn’t just collapse inward, but actually holds some shape.
The white PVC pipe was attached to a hiking backpack frame with zap-straps (zip-ties) and spray painted black.
Puzzle-mat foam legs and arms were added, but were purely decorative.
I used the scraps of the puzzle mats I decimated earlier to make the spikes or fringe on the spine, trimming off only the puzzle part, spray painting them, and then hot-gluing them on. A first try using adhesive velcro didn’t work, but hot glue came to the rescue!
Fly Dragon, Fly!
We tried a few different models for wings. I have a friend that builds really cool articulated wings that are hinged and very realistic, but for sake of ease of operation, we decided to go much simpler. I used some very cheap green fabric, cut it into wing shapes, and attached it to the back of the dragon at the PVC point (using little eyelet rings). The end of the wings were attached to bamboo sticks, and that works just fine. Very easy to use, very light.

Breathing Smoke
Getting the dragon to breathe smoke would be icing on the cake if I could figure it out. I knew there was a way to mount a smoke machine in the dragon body, but I ran out of time for that, so I decided to take a different route.

I purchased some $13 black sump pump discharge hose, and fed it through the dragon body to the neck. The end of the hose was pushed through a hole in the neck, and can easily attach to the dragon head via the attachment that came with the hose. I could have just strapped it into the head, but the head needed to be detachable, so I needed a head attachment easily plug in and out of the hose, so I used the one that came in the bag and just inserted it through the foam of the head. The tail end of the hose was fed through the tummy and down the back of the backpack, where it was strapped to the white PVC support, and trimmed there. A second black hose could be plugged in there, and fed to the the smoke machine, which allowed the dragon to breathe smoke for a minute when only its head was on stage, and then unplug from the smoke machine to actually enter the stage.
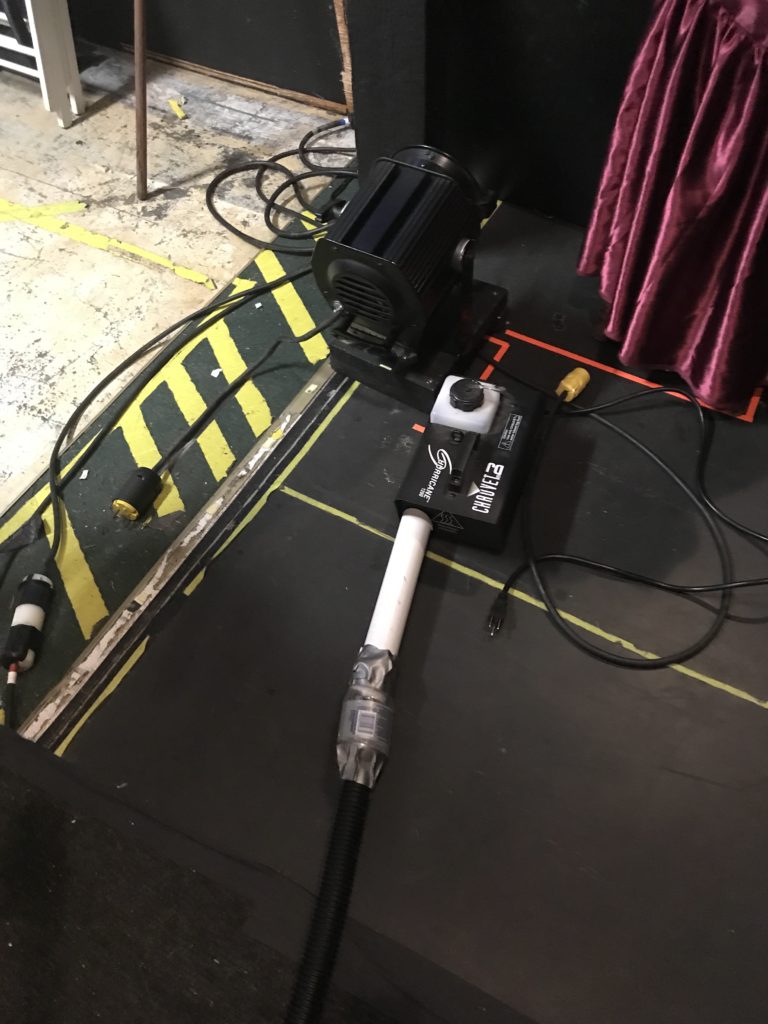
The black hose got a little warm around the nozzle of the smoke machine, so I built a PVC attachment that is better at absorbing heat.
In the end, it breathed smoke. It was cool. I put an additional finger light in the tube to give the smoke some colour, but I’m not sure it really did much in the powerful stage light. If I had more time, I would have built a hose inside the head that would focus the smoke a bit more, and give it more force, but it was still cool. Plus some came out the nostrils, which I liked! If I had WAY more time, I would have liked to mount a smoke machine in the body so that it could breathe smoke while actually fully onstage, but when building a dragon, one picks ones battles carefully.
The Final Product
Building a dragon puppet is hard. Really hard. I’m very happy with the product, and though there are things I’d do differently or just DO if I had more time, there’s no denying the puppet had some wow factor in the show. It was very lightweight, easily operated by two kids age 12-14. It makes me happy that if we ever need a dragon puppet for The Hobbit or Shrek or a fairy tale or a dinosaur play, I’ve got a sense of how to build one. I expect the same structure could be used for a few different kinds of giant puppets, but dragons are unique.
I named our dragon puppet Steph DeFirey after the playwright Steph DeFerie, who wrote A Play About a Dragon.
Please enjoy these photos of our beautiful girl!


CLICK HERE to see a video or two of it in action!
Materials
This dragon cost somewhere between $250 and $350 dollars. If I had to build it again right now, I could do it for less, because I wasted some money on trial and error as well as on materials that could be purchased in bulk if I had known to. Fabric was the highest cost ($110), and I actually could have used scrap fabric I had in storage, but I was being particular about colour and weight.
Here is a not entirely exhaustive list of what I used and what it cost:
- 1 roll of white PEX water pipe – $12 or so
- 5 large hula hoops – $1.25 each (you could use PEX for this, but the hula hoops are lighter)
- 10 puzzle piece mats – free for me, but EVA foam can be found at dollar stores as well, so maybe $20 worth
- 2 clear Christmas ornaments – $1.25
- 2 red finger lights from Dollarama – $3
- 2 Swiffer-style Dollar Tree mop heads – $1.25 each
- 1 Dollarama Paint Pad – $4
- 10 sheets of 1/16” fun foam – $14
- 5m of fabric for the back and 4.75m for the tummy – $80
- 3m of fabric for the wings (I used tulle and another green fabric for layering) – $30
- External frame for hiking backpack – $15 off Kijiji
- 16′ of grey PVC conduit – $10 or so. Pick the diameter that gives you the amount of bounce you want in the spine
- 6′ of white 2” white PVC pipe – I don’t know what this costs, but not much. We had some in stock.
- 2 bamboo sticks – $1.25 from Dollarama
- Spray paint: two cans of forest green, one can of dark green, one can of gold, one can of black – $13 each
- 1 Dollar Tree Garden Soaker Hose, black – $4
- 30 Ring clamps – $35
- 24′ Universal Hose Kit for Sump Pump Discharge, including attachments – $13
- 3 small tins of contact cement (should have bought in bulk or used industrial hot glue)
- 3 Dollarama broomsticks – $3 each or so I think
- 5 sticks of hot glue (big sticks)
- Lots of strong zip-ties
- Needle and thread
- Adhesive velcro
- 4 Quicklinks or caribiners
- various washers, ropes, strings, hardware, paintbrushes, duct tape, gaffe tape, etc. etc.
- 2 bottles of Diet Pepsi (partially for my own refreshment, but I totally used them for the fog machine attachment!)
- 1 belt – I made a little belt cup for Alyssa to rest the sticks in when she needed to switch hands. It was just a tiny length of the white PVC, painted black, and zip-tied to a belt. We used a normal every-day belt, but if it had been a heavier load, we had a mover’s belt standing by
Tools:
- Heat gun for forming foam
- Drill
- Industrial hot glue gun
- Screwdriver for ring clamps
- Straight pins
- Clamps and things to hold stuff while it dried
- Exacto with SHARP blade
Tips:
- A sharp exacto blade will make all the difference
- Straight pins help keep things together while glue dries
- Contact cement is fine, but hot glue worked better for some tasks
- Plastic doesn’t want to stick to foam, so bolt hardware on
- Make sure you have a BIG working space
- Hula hoops are flimsier, but lighter than PEX piping. I used both for different things
- When using contact cement, let it FULLY dry before manipulating or you just end up having to do it over again and wait longer. I spent SO much time waiting for glue to dry.
Recent Posts
January YP of the Month
Happy 2026! And here at CYPT, a new year means a new YP of the month! This month's YP will be wowing audiences in our…

50/50 Winning Ticket!
The winning 50/50 ticket from the Mrs. Pemberschmidt's Grade Twos Proudly Present A Christmas Carol iiiiiiiiiis..... #033439! Please email jamie@cypt.ca if you have the matching…

December YP of the Month
Here at CYPT, we've just opened our Christmas show, and the holiday spirit is in the air! There's so much to celebrate, but chief among…
CYPT Sponsors
& Supportors